![CARMA Stacked Negative Logo.png]](https://help.carma.com/hs-fs/hubfs/CARMA%20Stacked%20Negative%20Logo.png?height=40&name=CARMA%20Stacked%20Negative%20Logo.png)
You can create a dashboard using ready-made widgets or build more customised widgets using Widget Studio.
Create a dashboard
From Socials Professional:
- Select the + button at the top of the page.
- Select Add Dashboard.
- Enter a Dashboard Name.
- Choose your Screen Dimensions.
- Choose the appropriate Permission.
- Select any ready-made widgets you want to include.
- Select Save and Close.
Choose your screen dimensions
Screen Dimensions control the width of your dashboard canvas. Choose from:
- Regular
- Wide
- Extra Wide
- Ultra Wide
Choose the option that best suits how you want to display your dashboard.
Choose who can access your dashboard
When creating a dashboard, choose from the available permission settings:
-
Public – Only Me (Everyone in the project can see the dashboard under the Public tab, but only you can edit it.)
-
Public – All admins (The dashboard is available under the Public tab and all admins can edit it.)
-
Private (The dashboard appears in your Private area.)
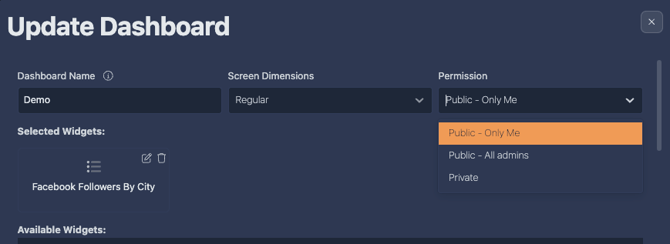 Choose the appropriate permission when creating your dashboard.
Share with specific users
You can also give specific users access to your dashboard.
Select the Share with Others icon and choose the users you want to share the dashboard with by email address.
Shared users receive read-only access.
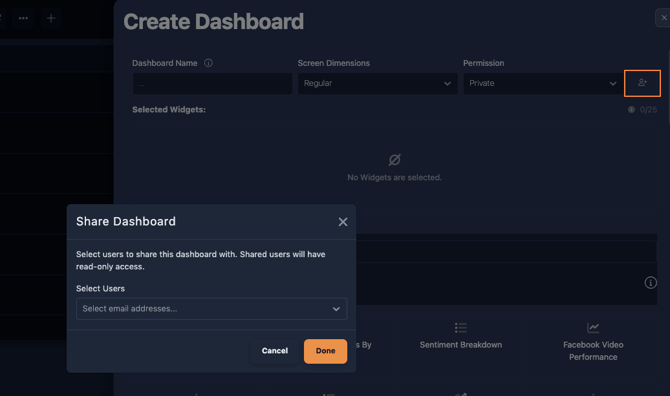 Share your dashboard with specific users by selecting their email addresses.
Add ready-made widgets
You can add ready-made widgets while creating your dashboard.
Under Available Widgets, you can search for a widget or use the social network icons to browse the available options.
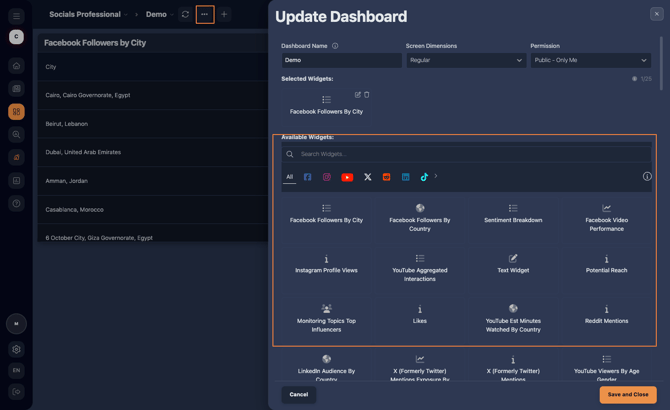 Search for widgets or browse them by social network.
To add a widget:
- Select the widget you want to use.
- Select Add widgets.
- The widget will appear under Selected Widgets.
- Add any other widgets you need.
- Select Save and Close when you're ready.
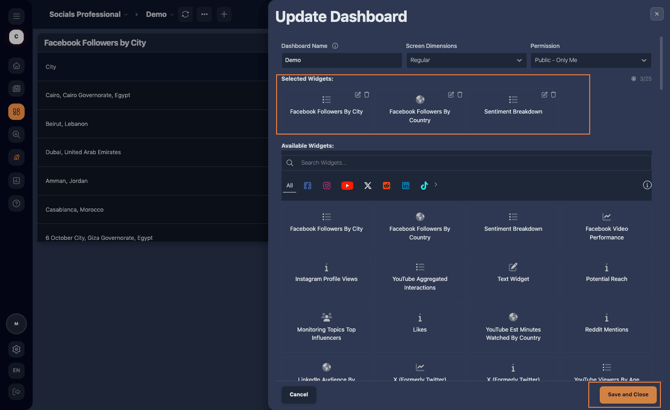 Widgets you've added appear under Selected Widgets before you save your dashboard.
Ready-made widgets provide a quick way to start building your dashboard. You can edit or remove selected widgets before saving.
Want more control over your analysis?
Use Widget Studio to build a custom widget by choosing your Social metrics, breakdowns and display settings.
Refresh your dashboard automatically
You can enable auto-refresh to automatically update the results displayed on your dashboard.
Select the arrow next to the refresh icon at the top of the dashboard to open the auto-refresh settings.
From here:
- Turn on Enable auto-refresh.
- Set the Refresh Interval in seconds.
To enable auto-refresh, your dashboard must be displaying results from the last 3 months.
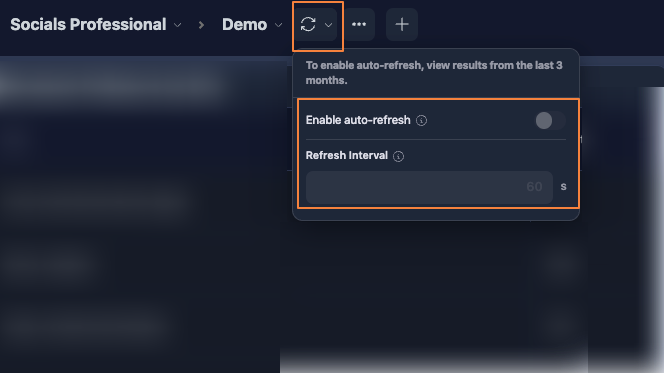 Enable auto-refresh and choose how frequently your dashboard results should refresh.
Manage an existing dashboard
To manage an existing dashboard, select the … menu beside the dashboard name.
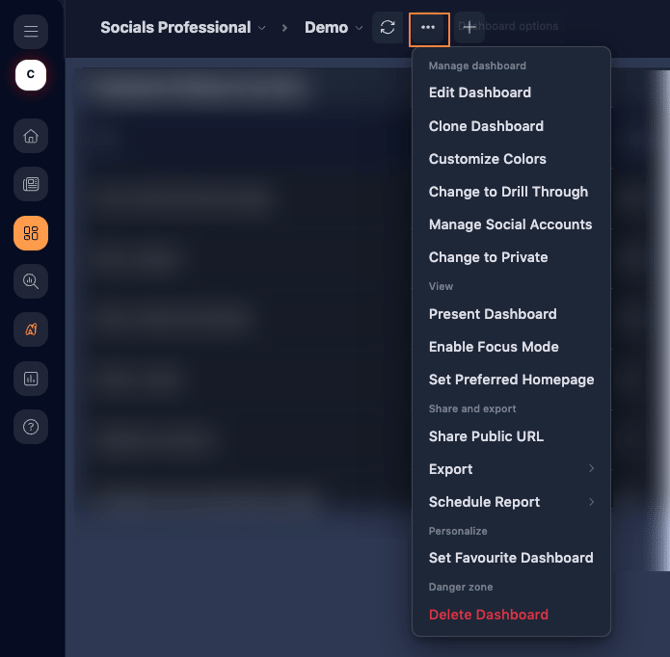 Use the dashboard options menu to manage an existing dashboard.
From here, you can access dashboard management options including:
- Edit Dashboard
- Clone Dashboard
- Customize Colors
- Change to Drill Through
- Manage Social Accounts
- Change visibility
- Present Dashboard
- Enable Focus Mode
- Set Preferred Homepage
- Share Public URL
- Export
- Schedule Report
- Set Favourite Dashboard
- Delete Dashboard
For more information about sharing, exporting and scheduling reports, see Share and export your Social data.