![CARMA Stacked Negative Logo.png]](https://help.carma.com/hs-fs/hubfs/CARMA%20Stacked%20Negative%20Logo.png?height=40&name=CARMA%20Stacked%20Negative%20Logo.png)
Create a Social widget
From your Social dashboard:
- Select the + button.
- Select Widget Studio.
Widget Studio takes you through four stages:
1. Choose your widget type
Select Visualization - which is the dedicated flow for Automated Data - and continue to the next step.
2. Select Social Networks
Under Media Types, select Social Networks as your data source (you can also choose combinations of media types)
3. Choose your metrics
The Metrics step lets you choose the information you want to analyse.
You can select up to four metrics. The order in which you select them is reflected in the resulting chart or infographic layout.
The social network icons shown on each metric indicate the providers associated with that metric.
You can also use the social network icons at the top of the page to explore the metrics available for different providers.
Choose between Post Level and Profile Level
Use the Post Level / Profile Level switch to change the metrics available to you.
The available options will update when you switch between the two levels.
Because available metrics differ, use the information displayed in Widget Studio to see which options are available for your selected level and social network.
Add breakdownsYou can use Breakdown Options to segment your selected data further.
The breakdowns available depend on the metrics you've selected.
If multiple metrics are selected, Widget Studio allows one breakdown.
Once you've selected your metrics and breakdowns, select Next.
4. Finalise your widget
The Finalize step lets you configure how your analysis will appear on the dashboard.
Widget Studio displays a preview of your widget as you configure it.
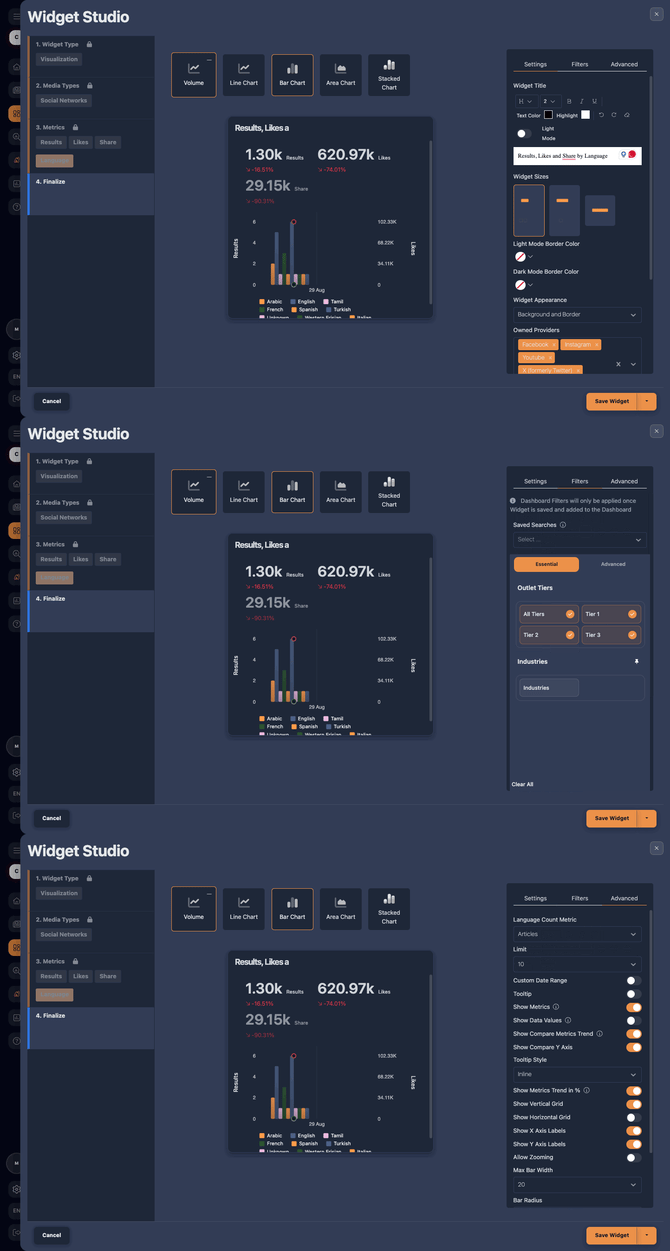 Check the three tabs for Settings, filters and Advanced for a full configuration
Depending on your configuration, the available options include settings for your:
- Widget title
- Visualisation
- Widget size
- Widget appearance
- Filters
- Advanced settings
When you're happy with your configuration, select Save Widget.
Your widget will be added to the dashboard.
Edit your widget
Widgets created using Widget Studio can be reopened through the Widget Studio workflow, allowing you to redefine their configuration.
This gives you more extensive configuration options than the streamlined editing experience available for ready-made widgets.
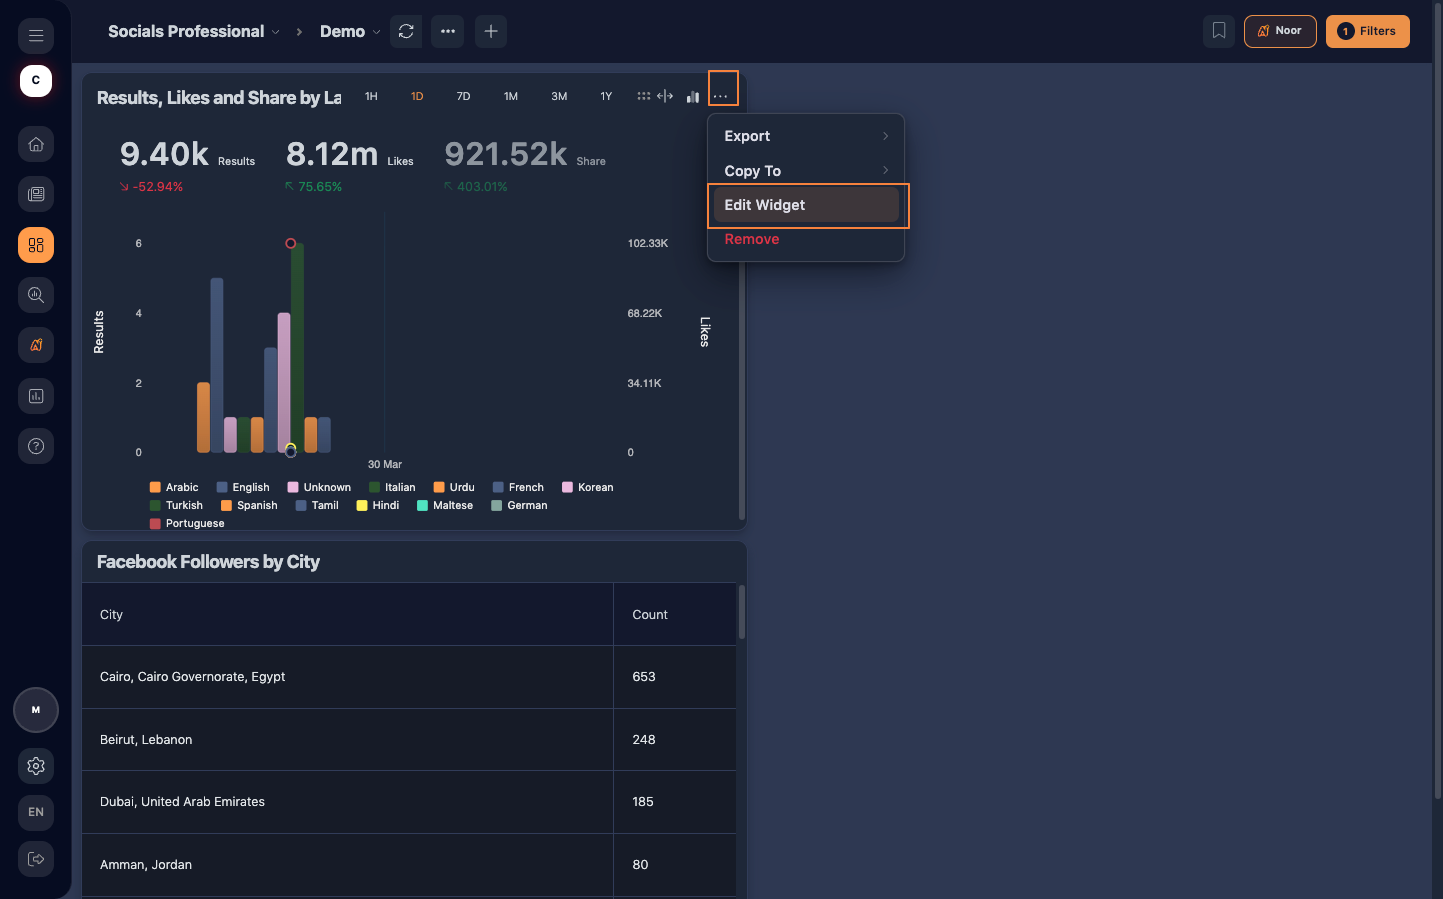 Reopen a Widget Studio widget when you need to change its configuration.
Ready-made widget or Widget Studio?
Choose a ready-made widget when an existing analysis already meets your needs. Use Widget Studio when you want greater control over the metrics, breakdowns and configuration of your analysis.