![CARMA Stacked Negative Logo.png]](https://help.carma.com/hs-fs/hubfs/CARMA%20Stacked%20Negative%20Logo.png?height=40&name=CARMA%20Stacked%20Negative%20Logo.png)
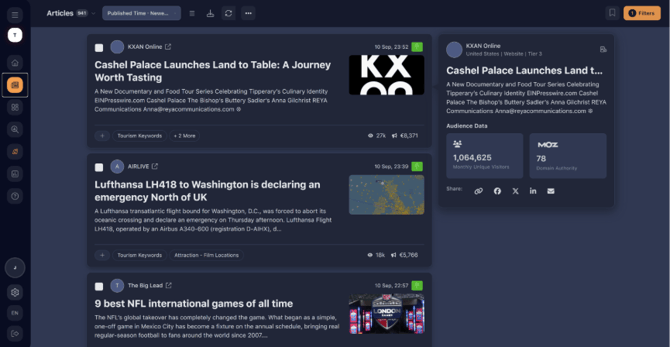
1. Open the Articles page
Open Insight and go to your projectʼs Articles page.
2. Set your filters
Select the Filters button in the top-right of the page to refine your search.
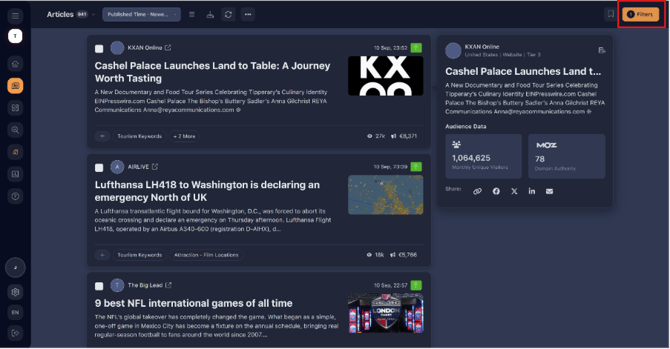
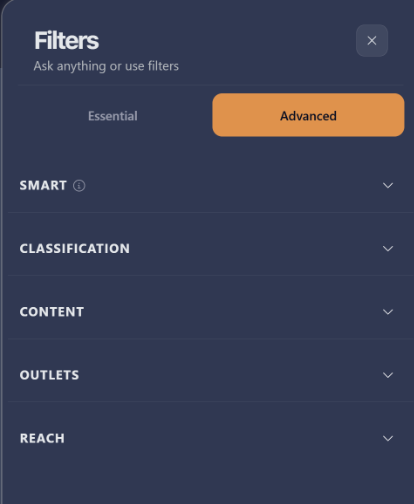
Use Essential filters (date range, media type and outlet tier) and Advanced filters for higher granularity.
3. Save your search
-
Select the bookmark icon in the top-right of the page.
-
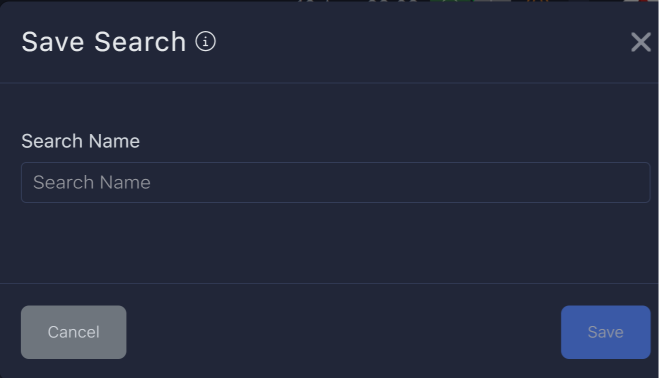
Select the + sign next to Saved Searches to save your current filters.

-
Give your saved search a name and save it.
Manage your saved searches
Use the options shown below to apply, set as default, rename, or delete a saved search. Steps 4–7 explain each action.
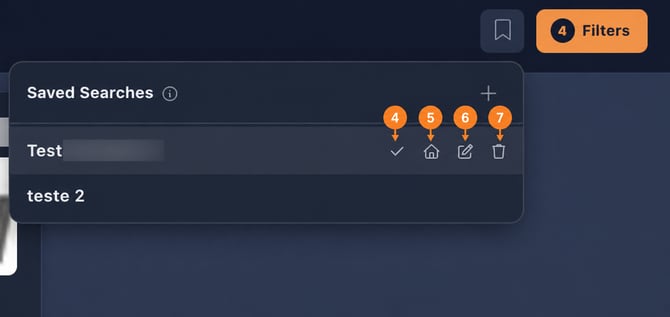 4. 4.Access and apply a saved search
To access your saved searches, open the Saved Searches menu next to the bookmark icon.
Select the saved search you want to use to apply its filters.
5. Set a saved search as your default
If you regularly use the same search, you can make it your default saved search.
Select the house icon next to the saved search you want to make your default. Your default search will then be automatically applied each time you log in.
6. Rename or update a saved search
To rename a saved search, select the edit icon and update its name.
If you want to change the filters themselves, apply your new filters and save them as a new saved search.
7. Delete a saved search
If you no longer need a saved search, open Saved Searches and select the bin icon next to the search you want to remove.
Where can I use Saved Searches?
Saved Searches can help you quickly return to relevant articles and can also be used with dashboards or Newsletters. And help saving time when creating recurring reports.